How to Add Clients
https://adviser.capitalpreferences.com.au/
There are two ways you can add clients to the platform:
1) Create clients manually
2) Import an excel file of clients and their details
In this article we'll review both methods.
1) Create clients manually
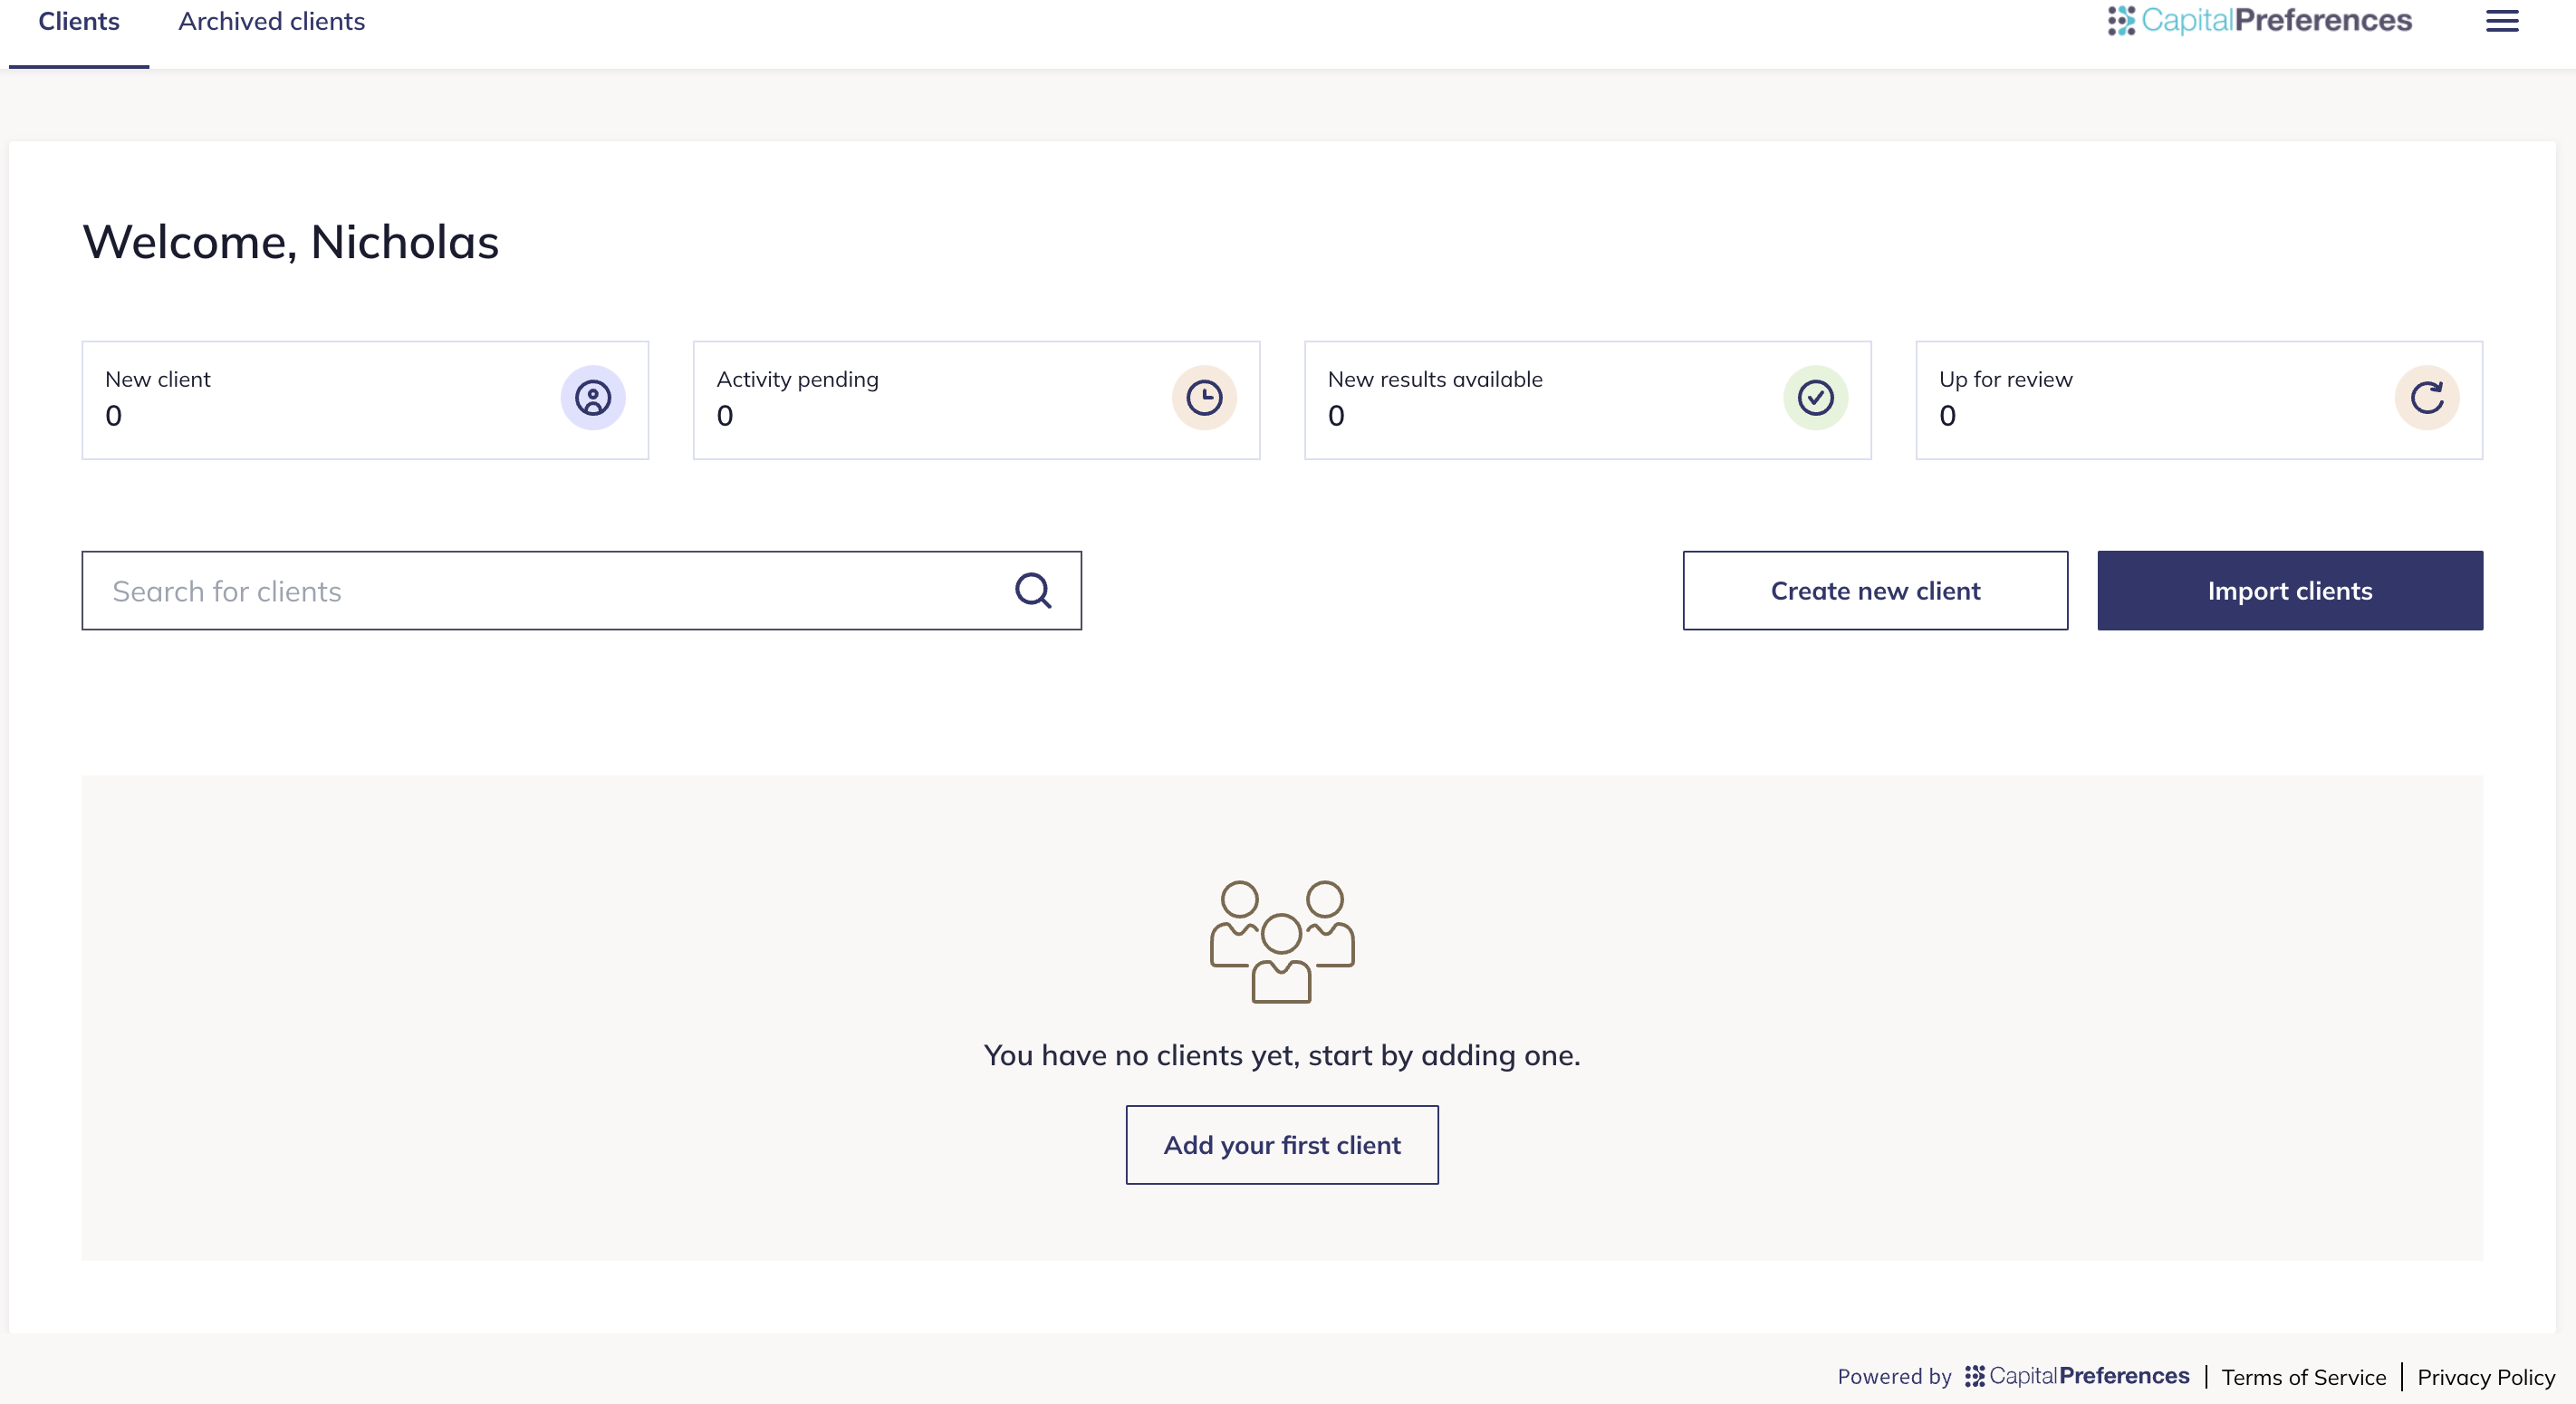
To create a client, click the Add your first client button on the below screen:
Next, you will be asked to fill in some basic information about the client, including the client's first name, last name, email address, birthday, investment amount, and if they're an existing client.
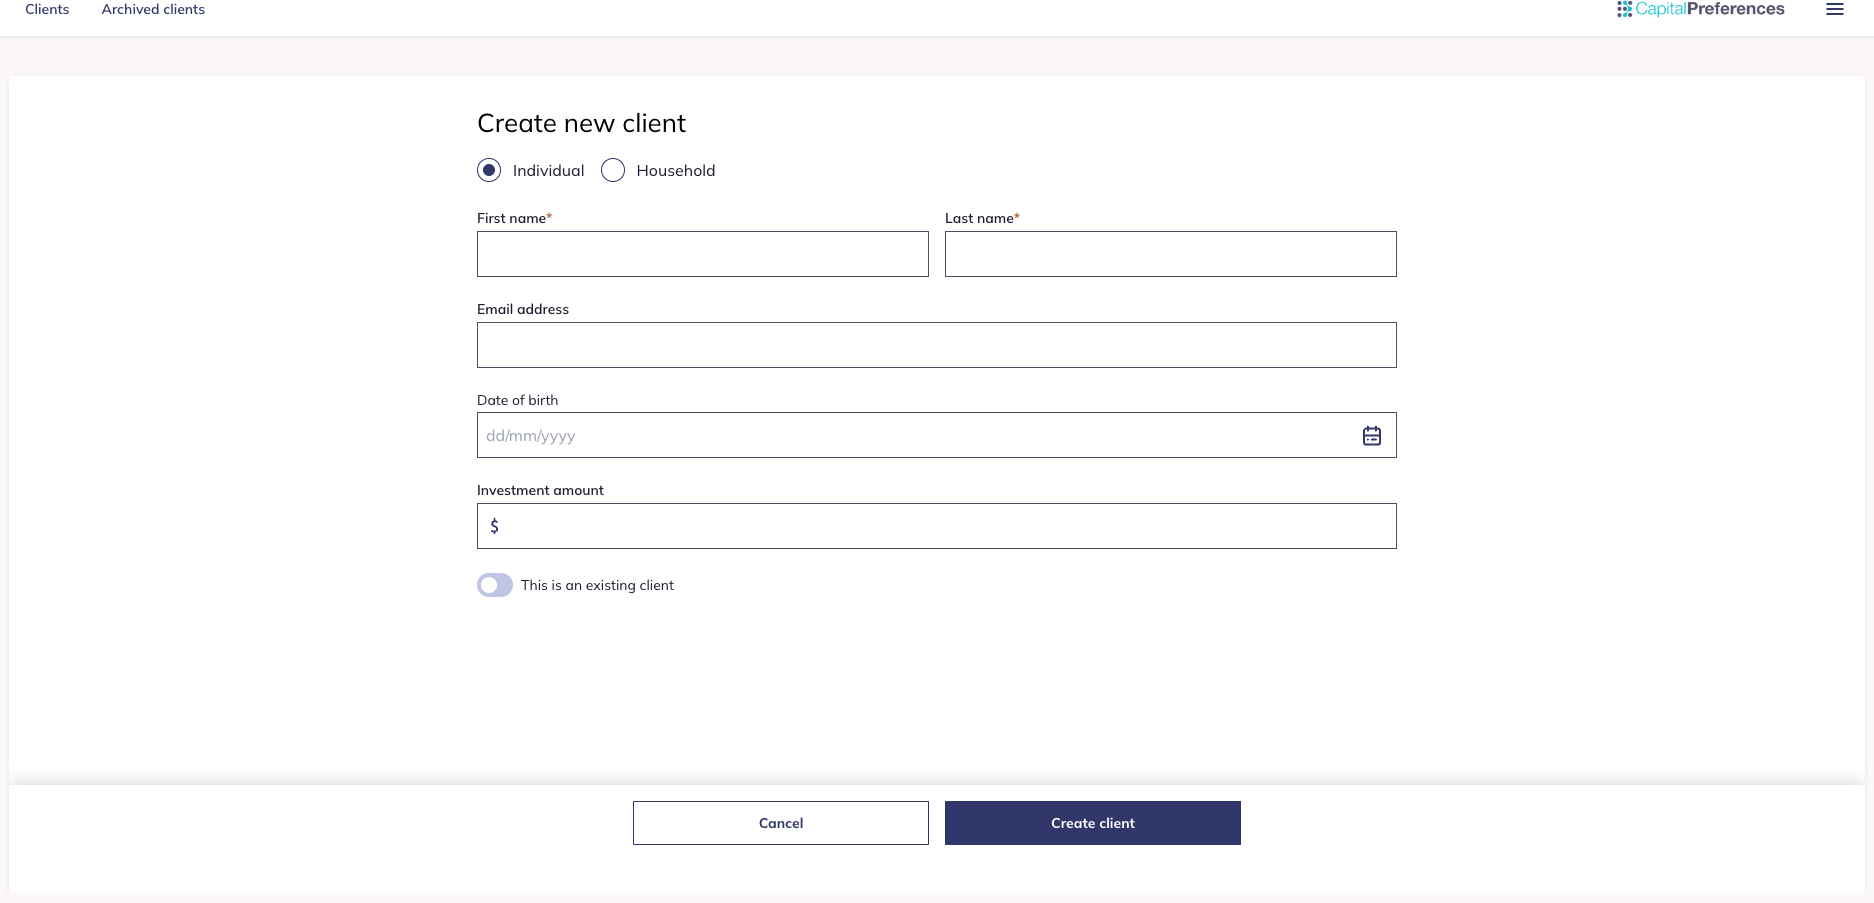
If you don't know your client's birthday or investment amount, those details can be filled in by the client when completing the risk activity.
Once you have added in those details, click Create client, and you will be taken to the client's profile page.
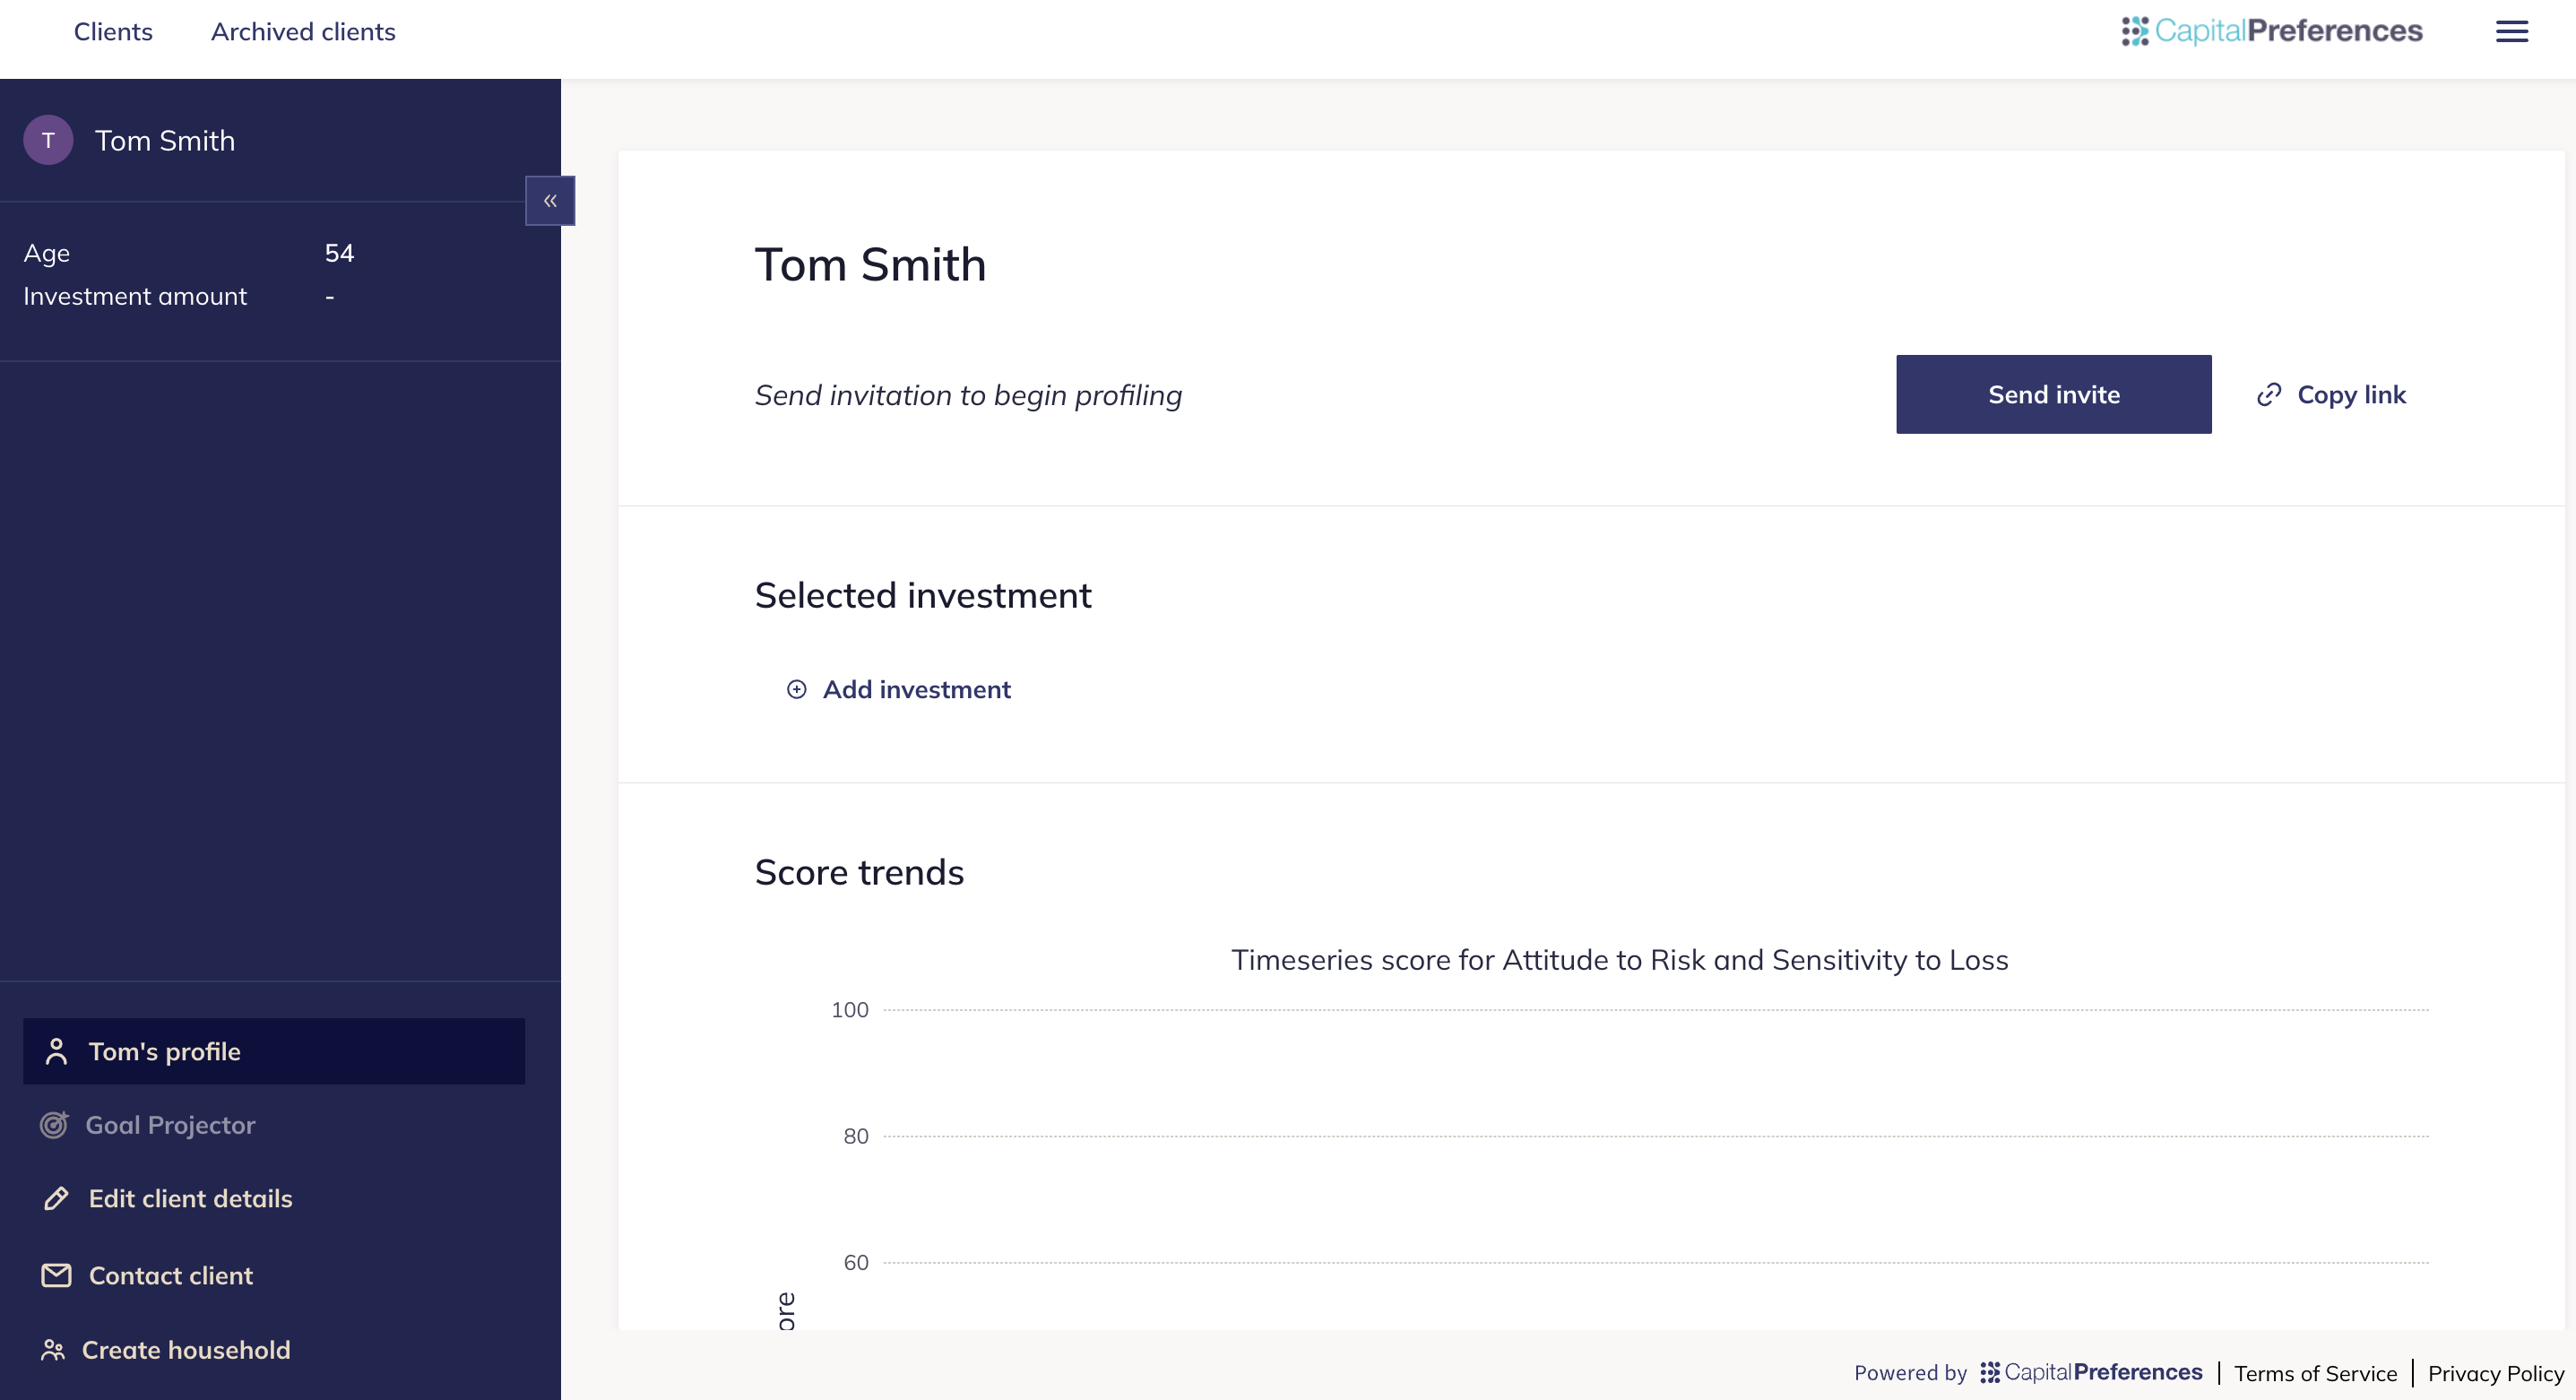
From here, you can send the client a link to the risk activity and see all information and documentation about this client once they have completed the risk activity.
2) Import an excel file of clients and their details
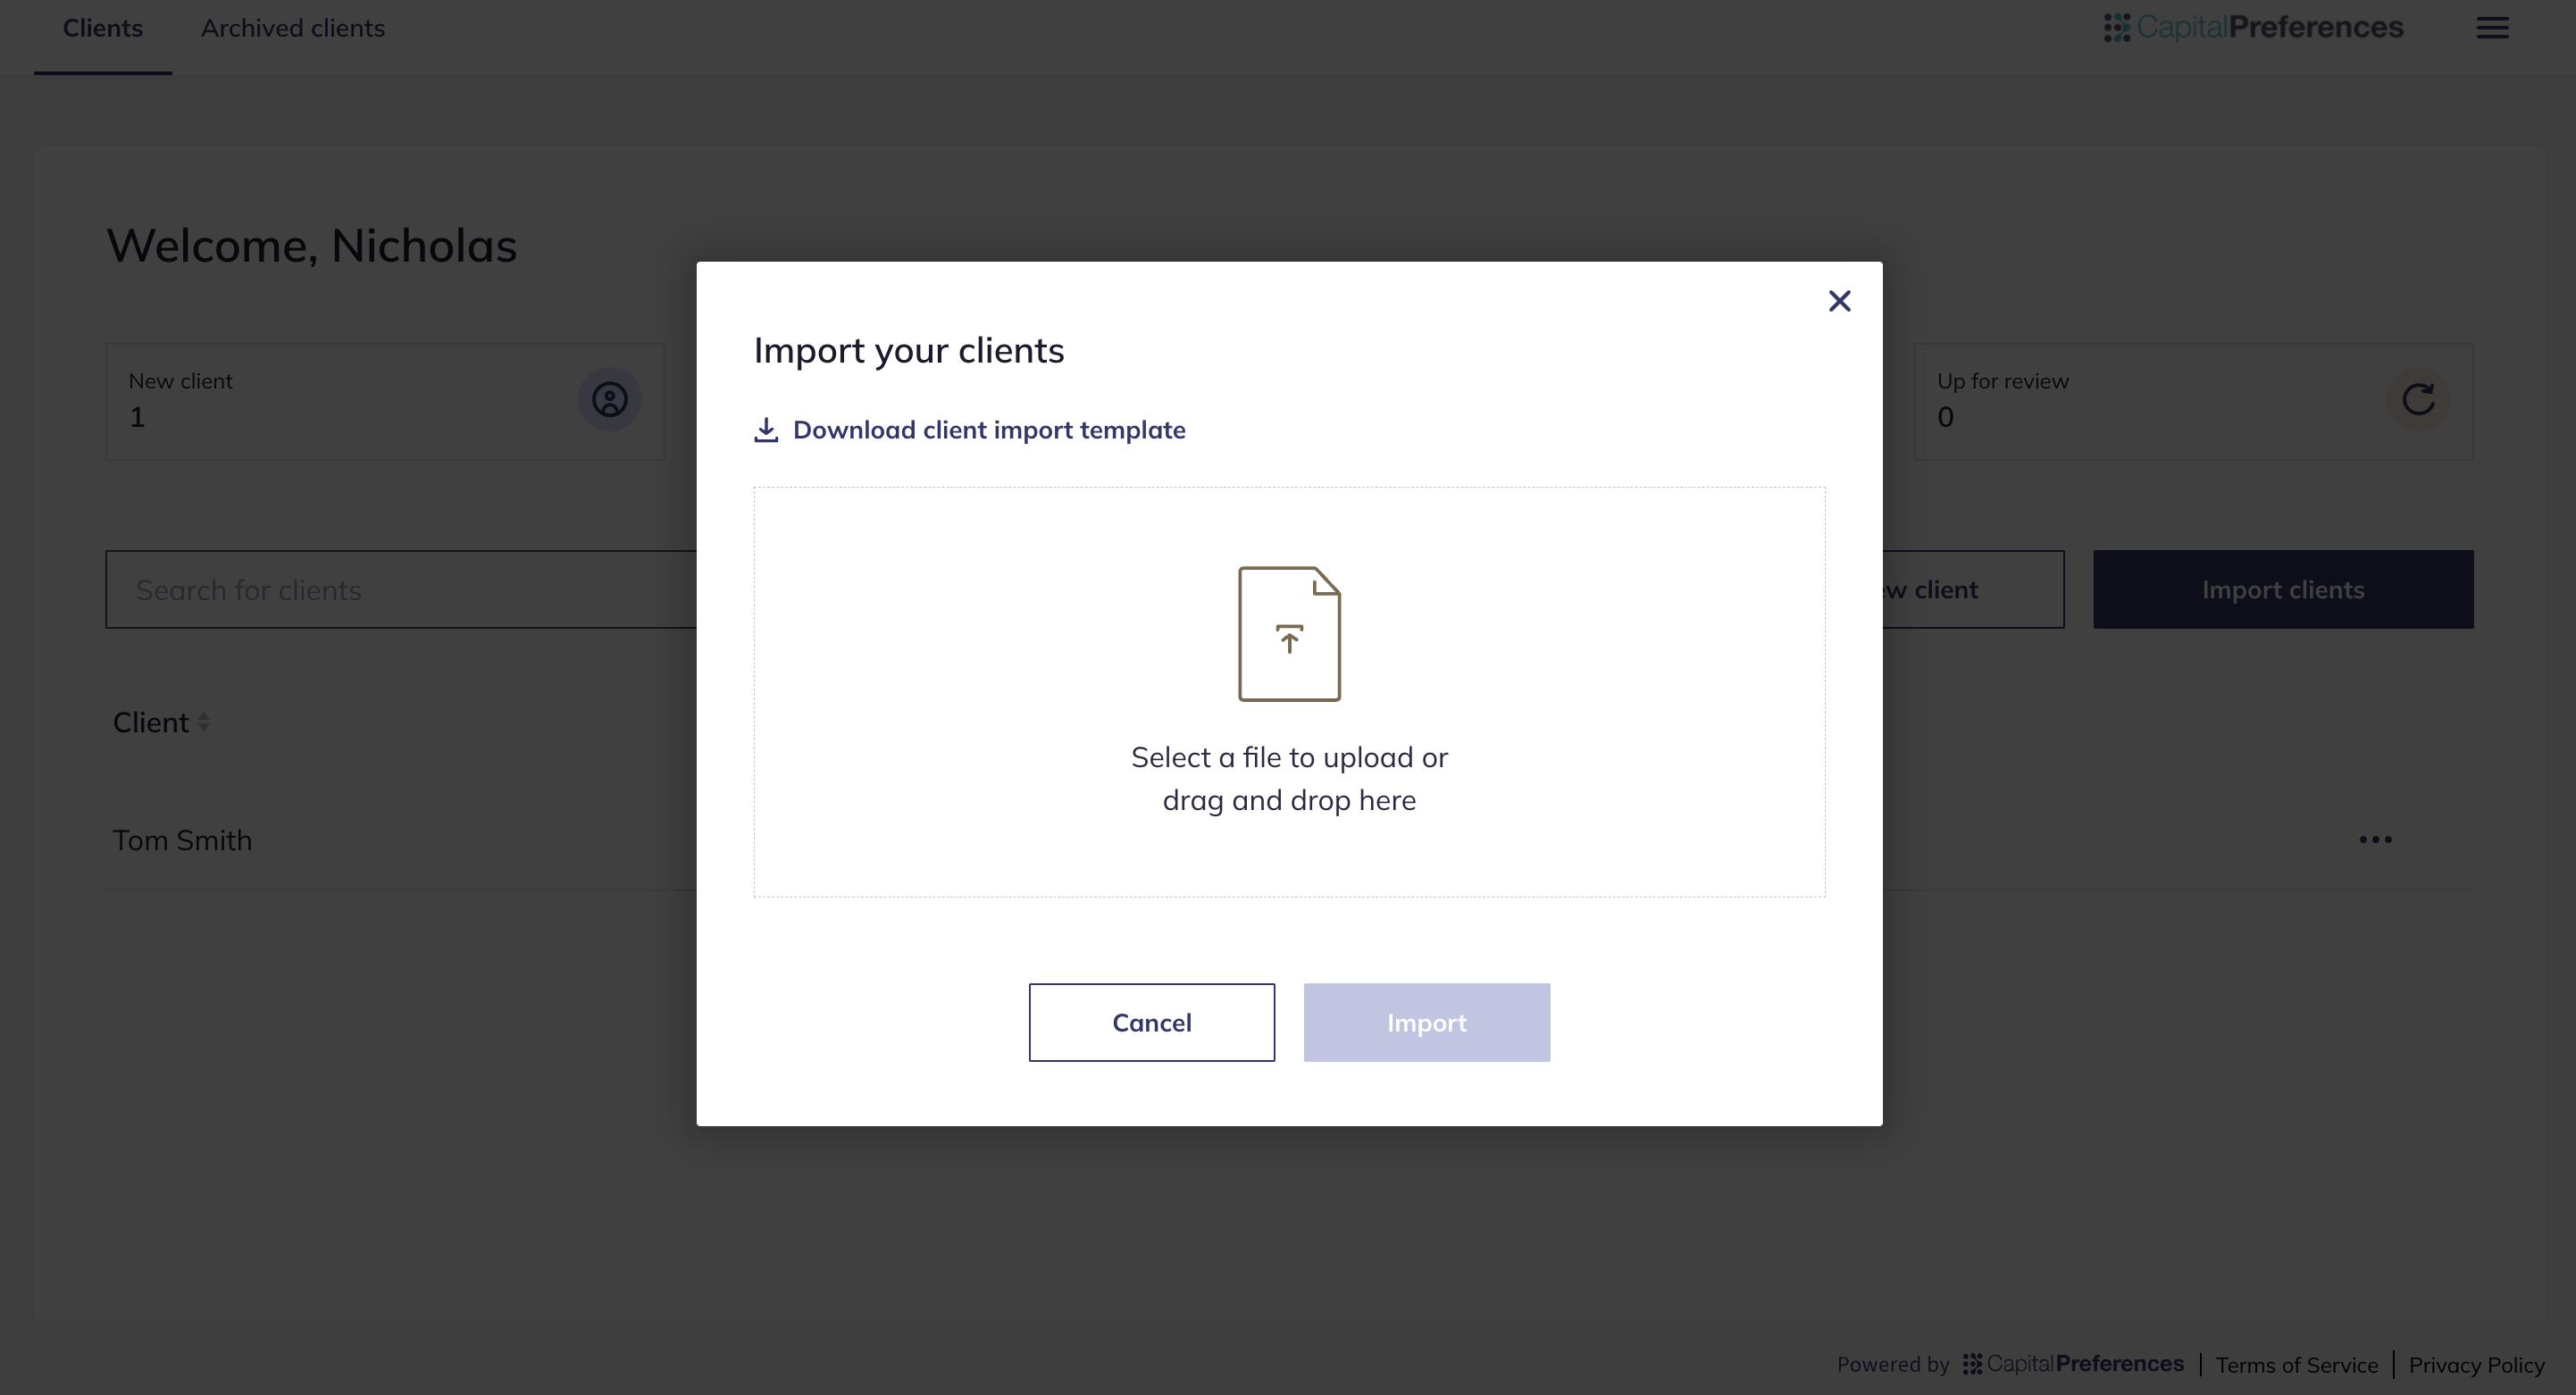
On the Clients tab click the option Import clients.

From here, click the blue Download client import template button in the top left corner of the pop-up. You may also download the template at the following link here.
This will automatically download the following Excel file:

Next, fill in each of the required fields for clients you intend to add to the platform. After you are done, save the file to your computer and return to the advisor portal.
From here, upload the file and click Import.

You will then see the following screen notifying you that your data has been successfully imported.

From here, you can click into each of your newly added clients' profile pages on the Clients tab and begin sending them the Risk Activity.
Did this answer your question?
If not, please feel free to reach out to us at customer-support@capitalpreferences.com